
Profields and SAFe Project Planning
In this blog, Matthew Flaws, Consultant at New Verve, explains how you can use Profields and SAFe to better manage project information with Jira.
Using Jira SAFe-ly (displaying SAFe related data in Jira)
Using Jira in a way that conforms to your specific ways of working can sometimes be a pain, especially when the way that works for you requires a little more detail at a high level.
Are you sick of being the person that has to constantly remind the project teams who is responsible for a particular role? Or do you like to keep all important project information in a single place for people to easily ingest?
Apps like Portfolio for Jira provide the ability to produce project road-maps, and to break down higher level work such as initiatives, but this information could seem like it is behind an iron curtain of planning information.
Natively, Jira does not give the user an option to store high level project related information in an single, easily digestible, repository.
For example, the Scaled Agile Framework (SAFe) has multiple organisational levels, each with their own information.
Being able to see an overview of basic project information, such as which Agile Release Train (ART) the project belongs, or who is the Product Manager could be a serious benefit for disparate global teams, or for external stakeholders.
Maybe you want to document all of the members, and their roles, for a particular project or release train in a single place where everyone has access. How would you do this?
You could:
- Create a confluence space. But what if the information isn’t worth a space or a page in it’s own right. Or you don’t want to switch between multiple applications. Or simply, you don’t have access to Confluence.
- Create an issue within the project to store custom field values. But then you’d need to keep track of the issue number, plus you’d always have issues that were perpetually living in the backlog taking up valuable real estate.
OR
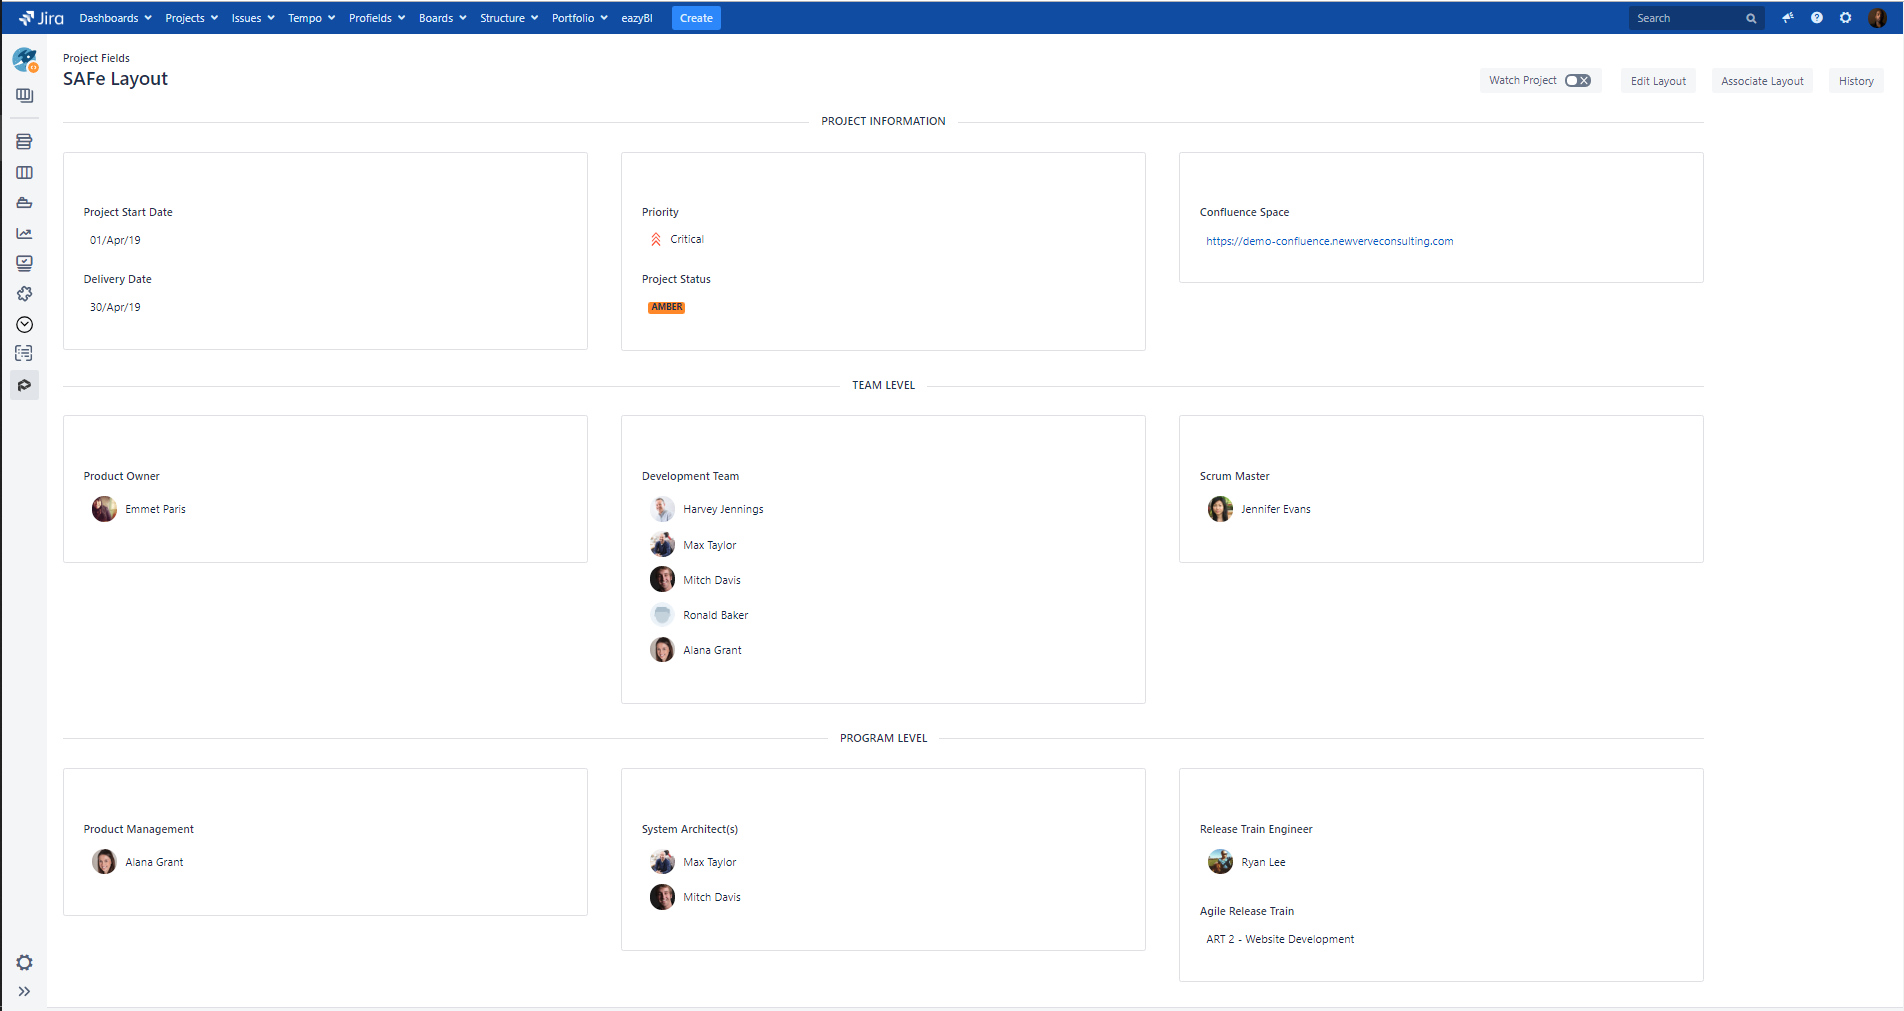
You could produce something like this, which is easy to maintain, graphically clean, and fully accessible to the entire project team (please zoom in or open the image(s) in a new tab for a more detailed view):


Being able to easily see who is involved, and their capacity of engagement, in the project provides insight to whom members could seek answers while also visually representing project responsibility.
In addition, basic project information can be stored within the layout to boost value to management and to be able to keep all team members on the same page.
By utilising the Profields app, from the Atlassian Marketplace, you can store project level information in fields just like how you can store information on Jira issues in custom fields!
How To - Creating a SAFe layout in Profields
For this example we want to show each of the members involved with a specific project. With SAFe, depending on the scale of SAFe that is practised, there are many different roles to be filled on different levels of the SAFe hierarchy.
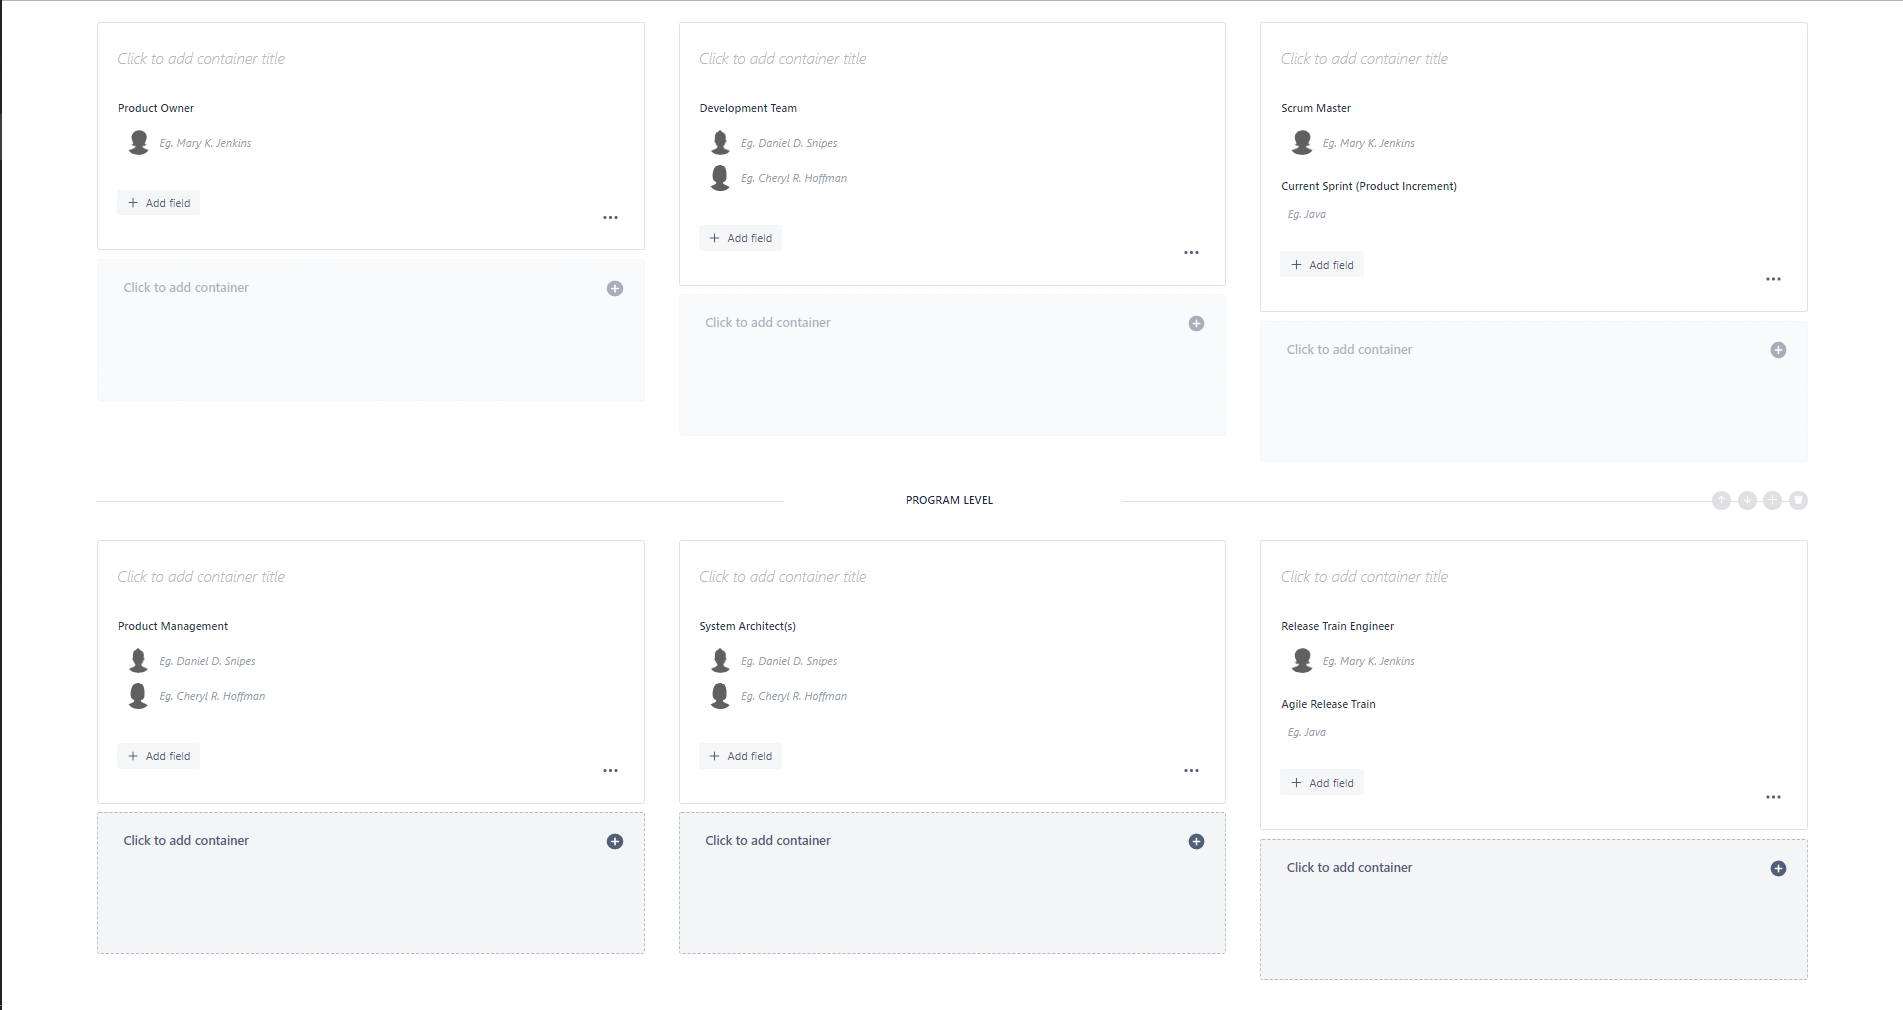
We will assume that we want to display only the ‘Essential’ SAFe roles which comprises of the ‘Program’ and ‘Team’ levels.
The roles that will need to be captured are:
Agile Team level
- Dev Team Members
- Product Owner
- Scrum Master
Program Level
- System Architect / Engineer
- Product Management
- Release Train Engineer
To capture data at a project level, Profields utilise ‘Layouts’ which are customised pages used to display and store custom fields and their values.
Each project can be given a single layout to use to collect and display it’s own specific information.
Projects can share layouts, reducing maintenance, or have a bespoke layout to give each project greater depth of information that might not be needed elsewhere.
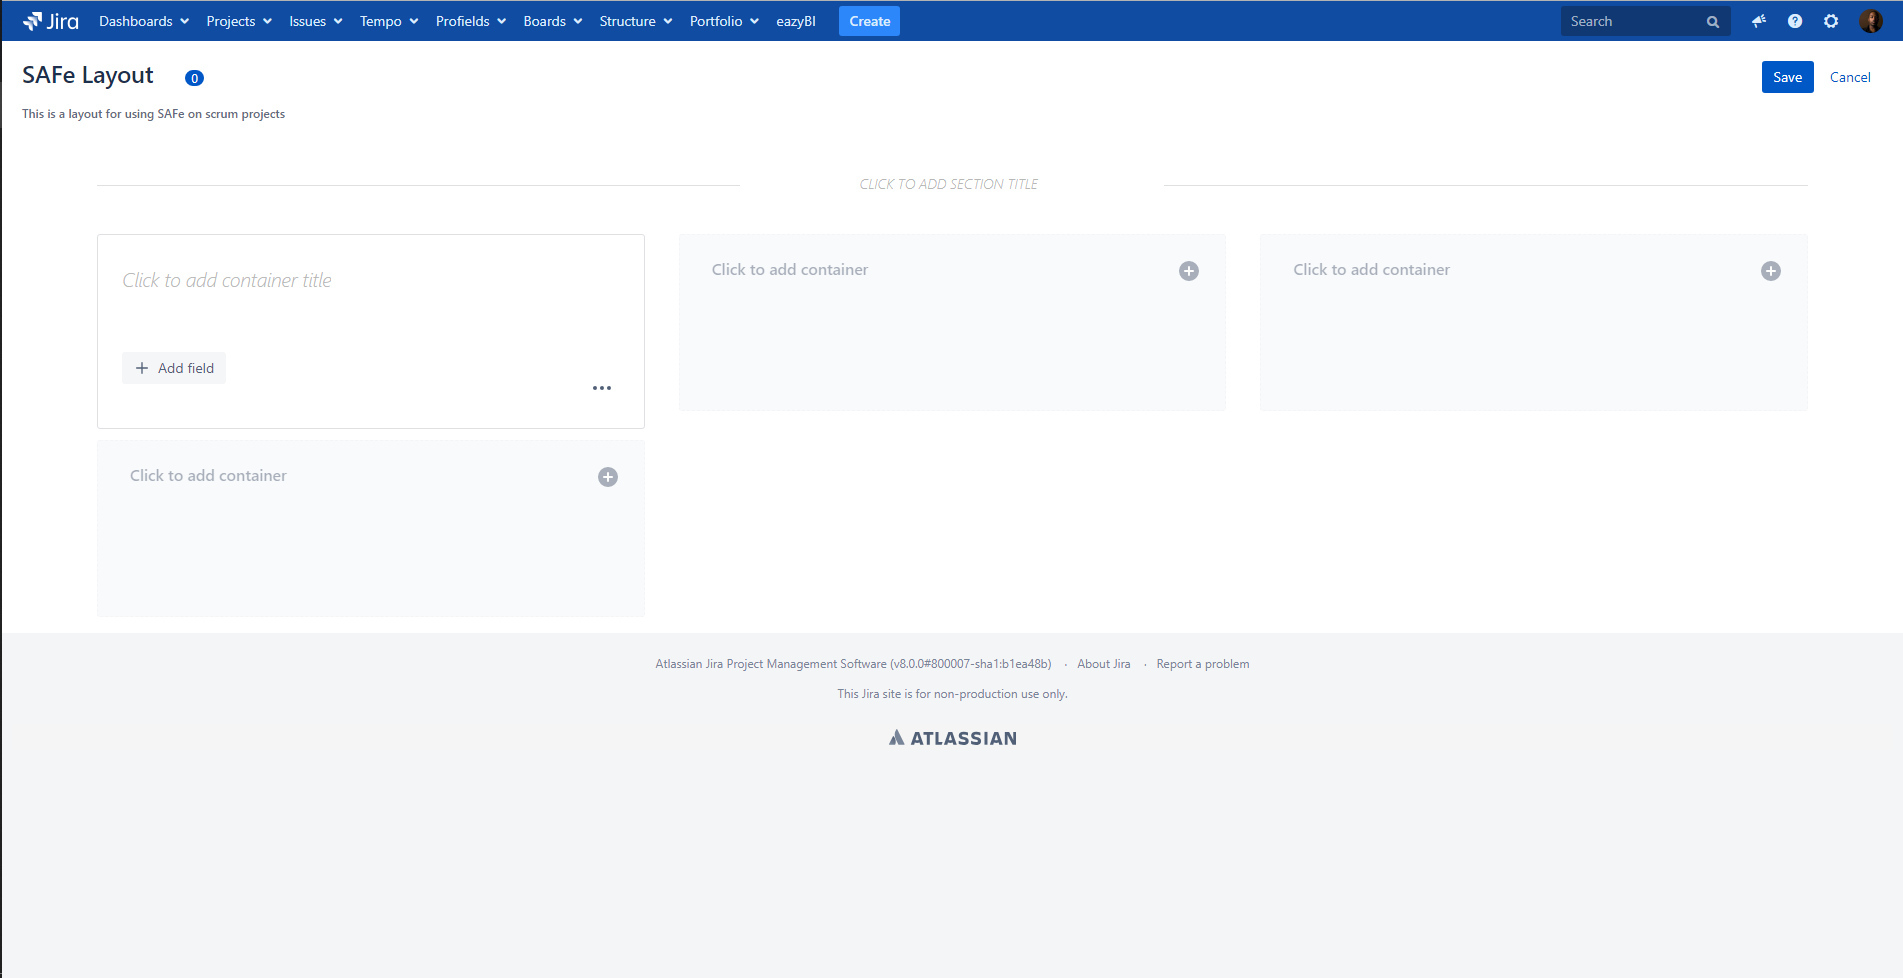
Creating a new layout
Navigating to ‘Layouts’ within the Jira header navigation bar will give you the option to create a new layout.
You can name the layout anything you desire. It could be the name of a specific release train, solution train, or project name. It could also be generic so it can be applied to multiple projects within your Jira instance.
For this example, I’ll keep it generic, calling it SAFe Layout with a generic description text:
Each layout is separated into sections. For the SAFe example, I think it would be logical to separate the sections into ‘Project Information’ for basic information, ‘Team Level’ for the teams involved with deliverable production, and ‘Program Level’ for strategic management and higher level information:
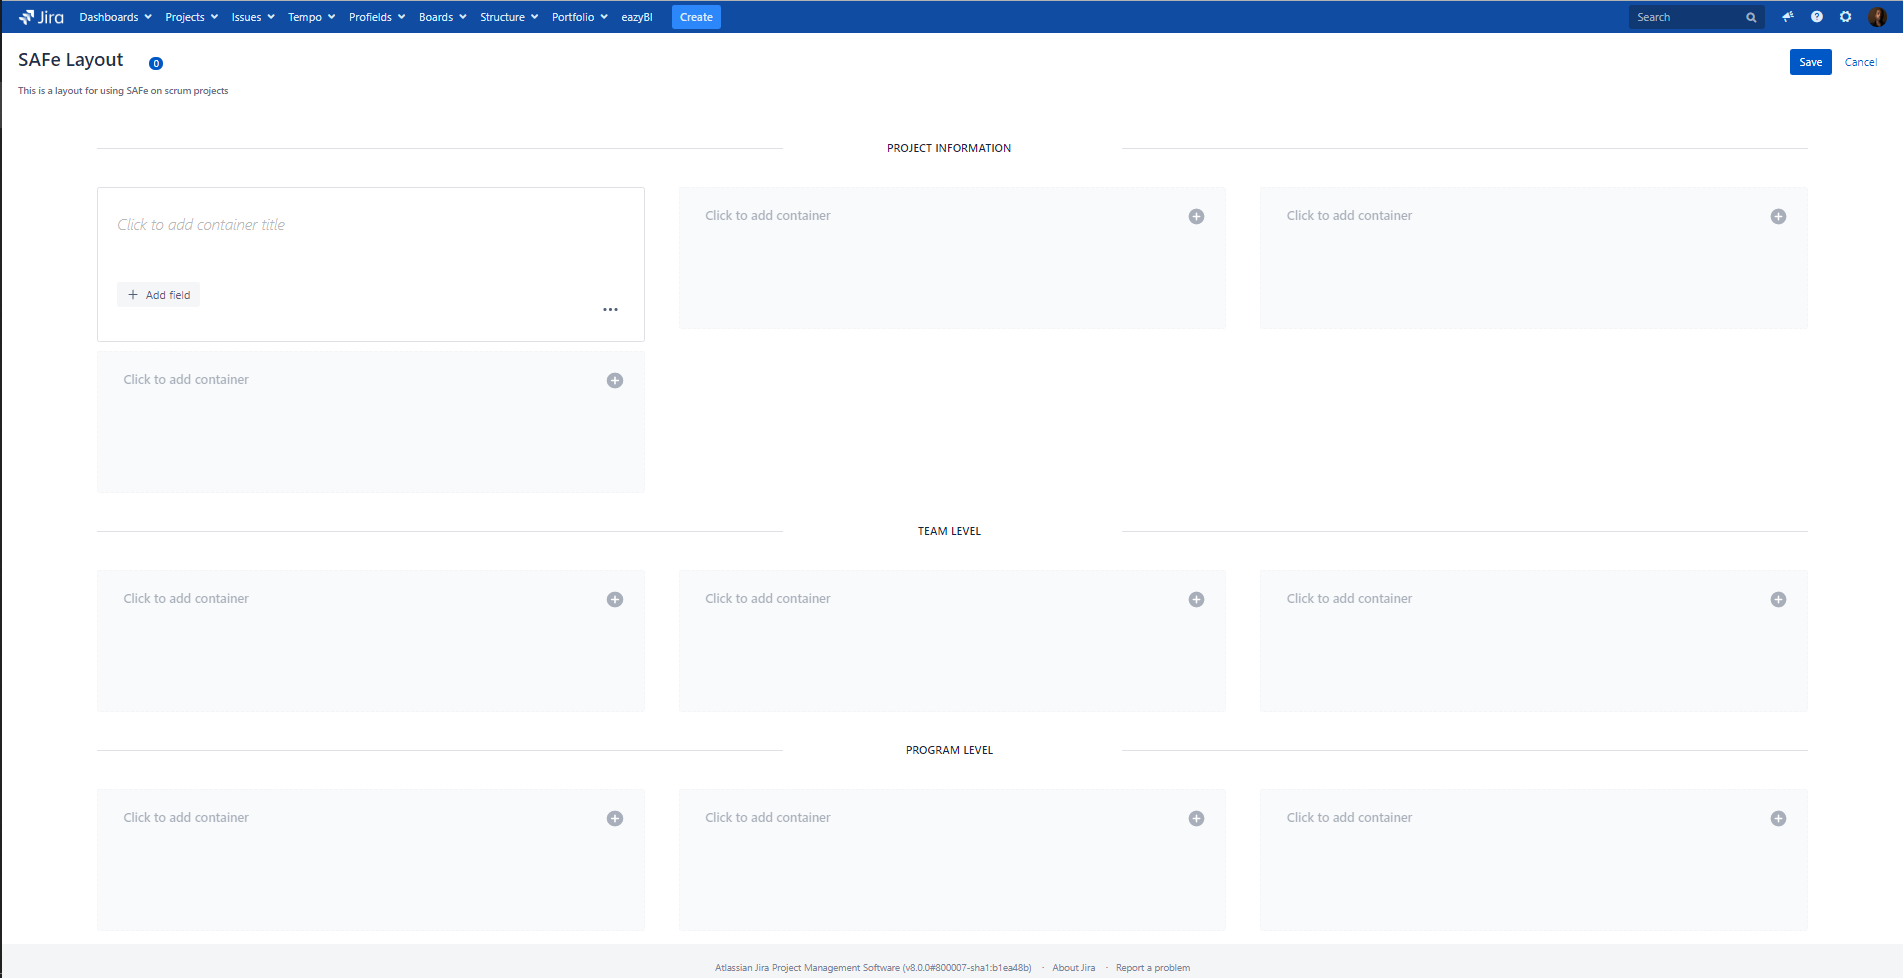
For your layout, you could choose any combination of information separation. The limit is your imagination.
Within each section you have ‘Containers’ to help divide out the fields and to make logical sub-groups. It also helps keep the layout looking nice and tidy!
Once we have the layout set up of how we would like to structure our fields, there is only one thing missing. The fields!
Creating new project fields
Profields uses project fields for projects the same way Jira uses custom fields for Issues.
There are two ways to create the new project fields, from the ‘Fields’ screen accessible from the Profields drop down in the Jira header bar, or from right here in the layout screen:
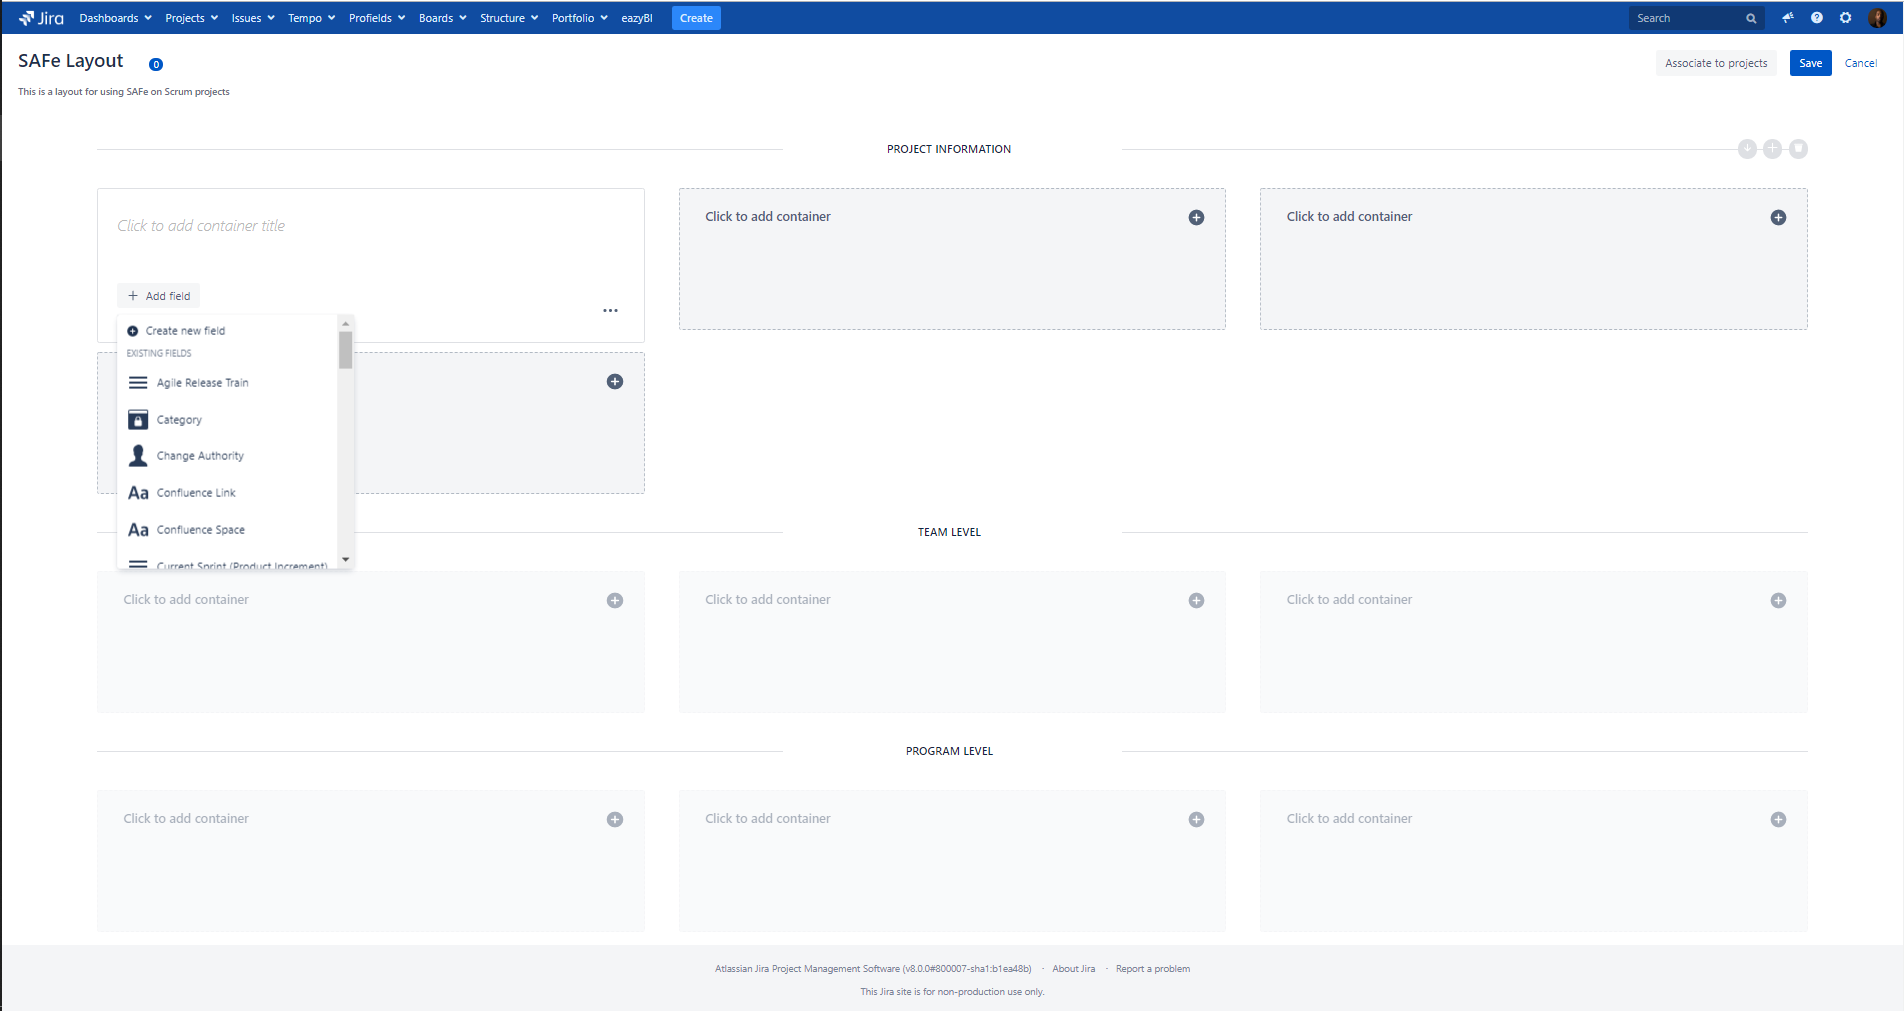
By clicking ‘Add field’ you can select any project field, or create a new field.
There are 12 types of fields, including script fields which use groovy scripts to display any data depending on your conditions. With scripted fields available, imagination really is the limit!
For more information regarding field types and how they operate, here is a link to the official Deiser documentation.
To capture the roles I will be using the ‘User’ project field type, for roles where only a single person should be responsible I have chosen ‘single user’ and ‘multiple users’ where there could be one or many people, such as ‘Dev Team’:
Don’t forget to click save in the top right hand corner! This has caused a lot of pain in the past and many times where I have had to recreate my layout!
After saving, click the ‘Associate to projects’ button and select all of the projects you wish for your layout to be associate with. This means that this particular layout of fields will be visible to the members of that project.
Viewing the data
Navigate to your layout page in the associated project by clicking the Profields icon in the project sidebar
After filling in the fields on the layout, you can forever point people to this page whenever the question of who is responsible or what ART the project is in pops up:
Do you have any good ideas of how to better use Profields to help manage projects in a SAFe environment? Let us know in the comments below!
Comments:
There are no comments for this entry yet.